If you are just looking for a compose file I’ll keep it at the top here:
services:
  app:
    image: 'docker.io/jc21/nginx-proxy-manager:latest'
    restart: unless-stopped
    ports:
      - '80:80'
      - '81:81'
      - '443:443'
    volumes:
      - /mnt/Docker Containers/App_Data/Nginx/data:/data
      - /mnt/Docker Containers/App_Data/Nginx/letsencrypt:/etc/letsencrypt
The official NPM github link: https://github.com/NginxProxyManager/nginx-proxy-manager
The only thing that will need to be changed above is under “volumes”, replace with your own storage location.
I am installing all my containers through Portainer but before we set up this App we have a few changes to make within Truenas itself, Nginx uses Port 80 and 443, these ports are also used by Truenas and so we have a conflict here, Portainer won’t let us install the App as is, you could change the ports that Nginx uses but for my use case I need Nginx to be listening on port 80 and 443, so instead I changed the default ports of Truenas:
On the home Dashboard navigate to System and then General Settings:
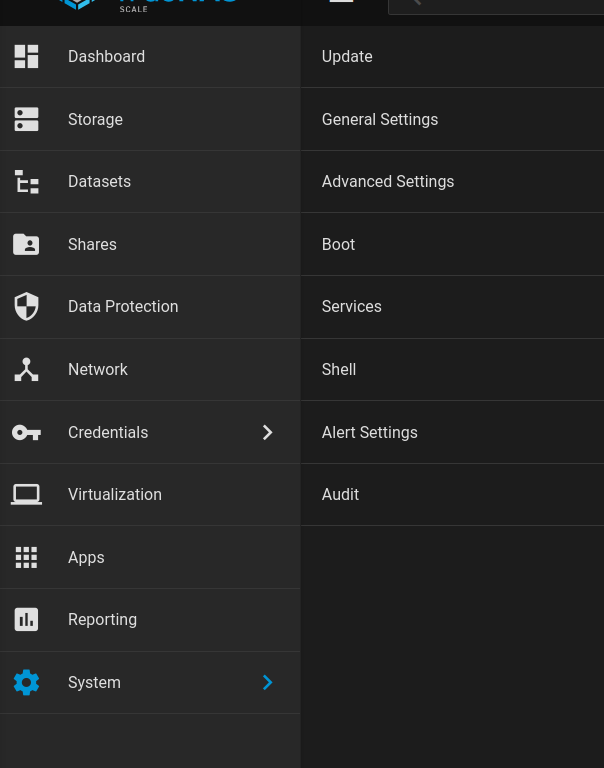
In general Settings – Go to GUI and Settings:

And here is where we will the the option to change the default ports used by Truenas
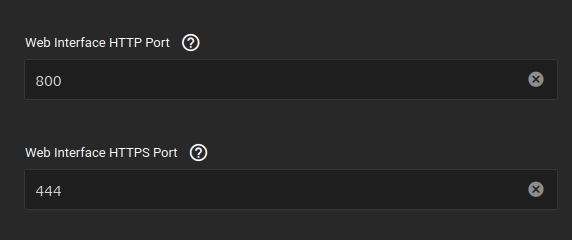
I’ve kept it simple and changed the ports to 800 and 444 (ideally easy to remember) – so now we can access Truenas GUI using these ports it frees up 80 and 443 for use to use with Nginx.
The Installation
If we navigate to our Portainer installation, on the homepage go to stacks

add a stack

Call our stack nginx (only lower case letters can be using in the naming, it will give a warning if you try to use any characters not allowed.
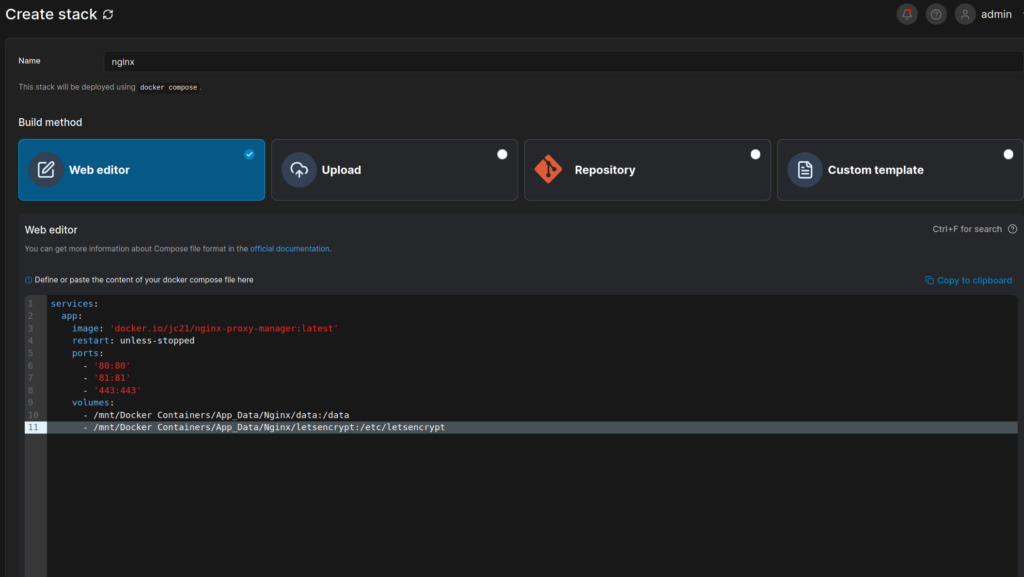
Copy and paste the the compose file from above into the “web editor” and then press the deploy this stack, that’s it we should now have Nginx installed
We can go to our containers dashboard to view all our running containers, under the heading “published ports” if we click on 81 we will be brought to the Login page, the default credentials are:
Username: [email protected]
Password: changeme
Initial Setup
Decided that this would be best as a separate page, otherwise this post could go on forever, please click Here to see how I’ve setup Nginx with Pihole.
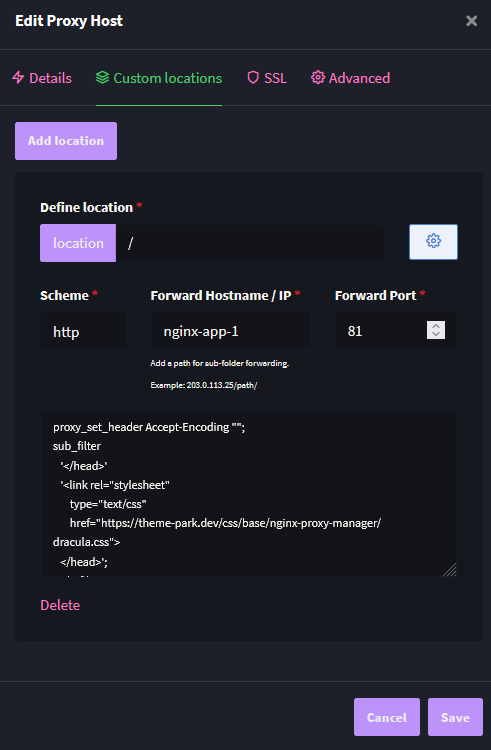
However quick one, if you want to change the theme of Nginx we will use:
proxy_set_header Accept-Encoding "";
sub_filter
   '</head>'
   '<link rel="stylesheet"
       type="text/css"
       href="https://theme-park.dev/css/base/nginx-proxy-manager/dracula.css">
   </head>';
 sub_filter_once on;
(for the Dracula Theme, other themes can be found here) and we do that by adding a custom Location to our previously Created Nginx Proxy Host:
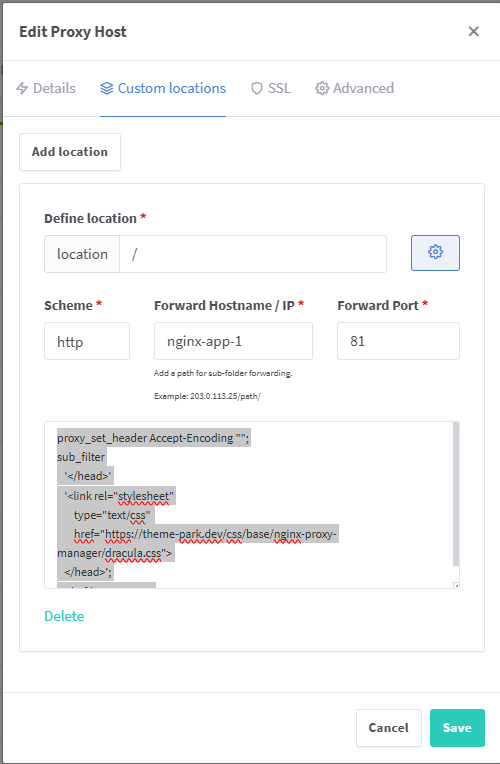
Press save, if it doesn’t update instantly don’t worry it could be a browser cache issue, open up your Nginx on a seperate web browser or use in private browsing and you should see:
Adding SSL
This is a work in progress, check back soon for a full guide.

Leave a Reply